Configure Ubuntu VM as NVA in Azure
Overview
A Network Virtual Appliance (NVA) is a Virtual Machine with Azure Marketplace image capable of performing routing and other networking functionalities.
There are several images from vendors like Cisco, Juniper, Palo Alto, Barracuda, etc. available in Azure Marketplace for deploying NVA as per your choice and speciality.
In this blog, we will deploy an Ubuntu VM in Azure with two network interfaces and to route traffic destined to internet from another VM.
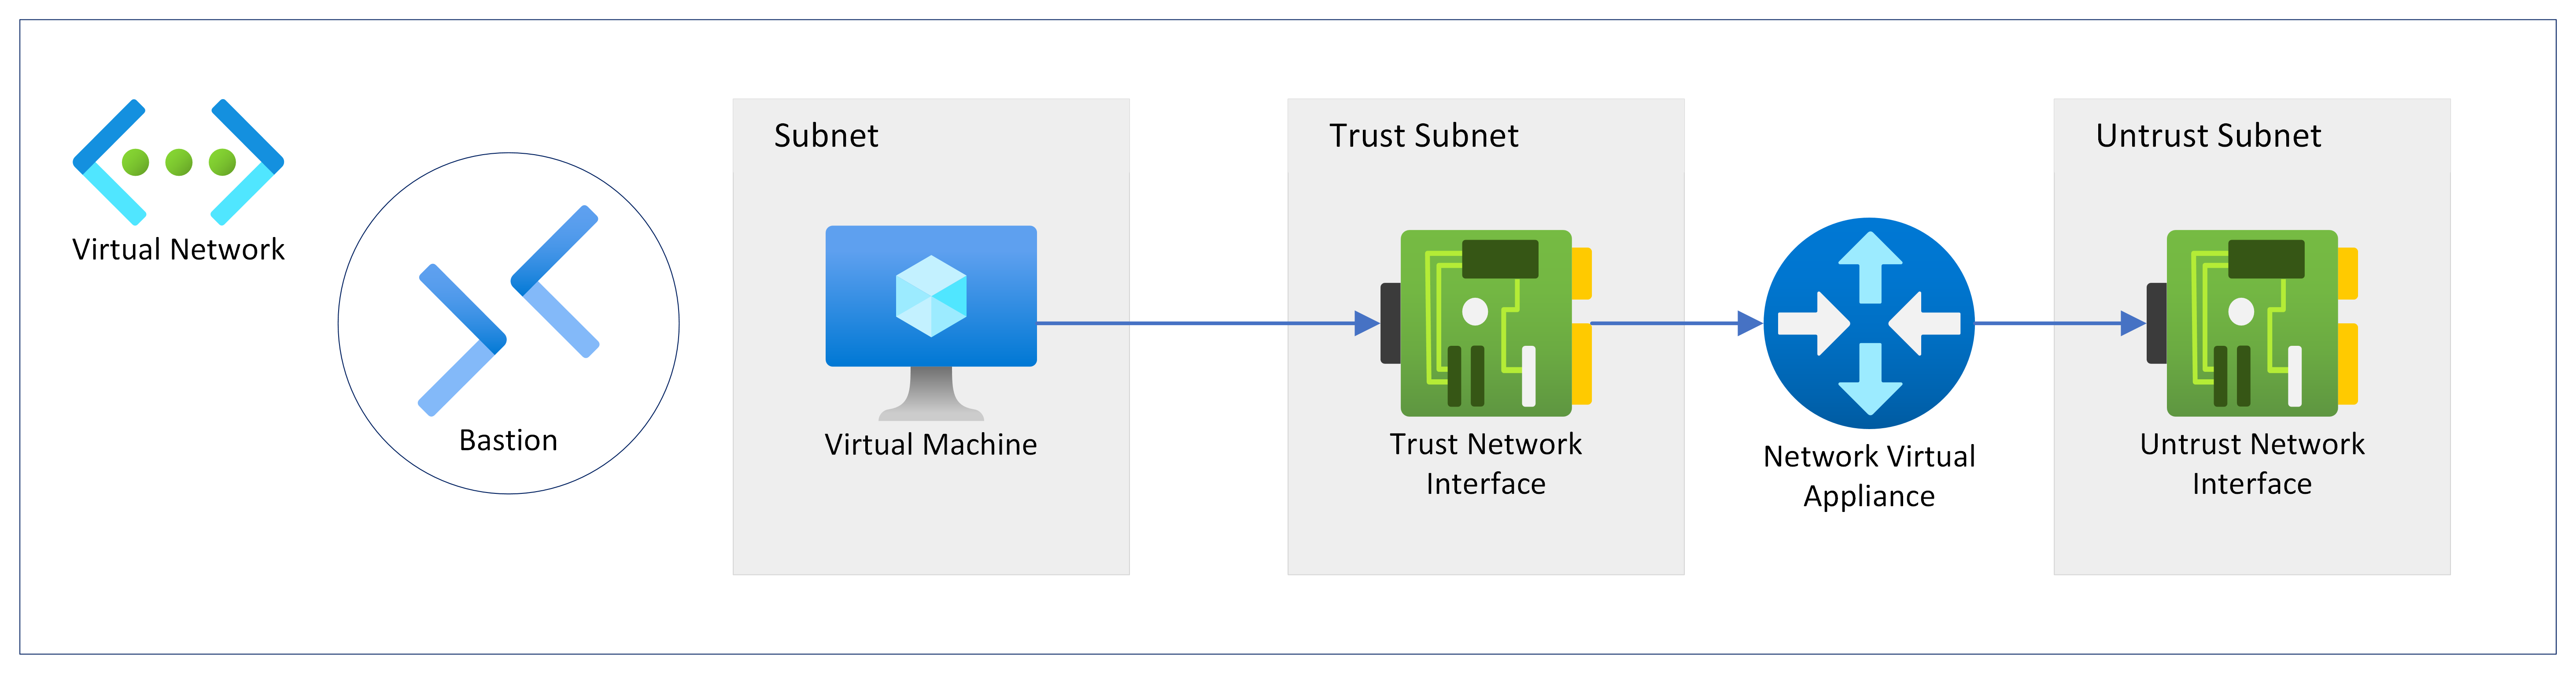
Network Archirecture
We will need to deploy following Azure resources:
- Virtual Network
- Bastion
- Virtual Machine with two NICs and public IP
- Virtual Machine (single NIC)
- Route Table
You may skip dpeploying Azure Bastion as this is only for accessing the Virtual Machines which could also be done by using SSH to the public IP.
This is how our deployment in Azure will look like.
Configure Ubuntu VM as NVA
Our Ubuntu NVA consists of two NICs; untrust NIC and trust NIC.
We will route internet traffic from VM to the trust interface of NVA by using user-defined route (UDR). The NVA would then route traffic from its trust interface to untrust interface. In our deployment, we have created a route table with default route (0.0.0.0/) via private IP address of the trust interface of the NVA.
We will configure our Ubuntu NVA for routing traffic received from trust NIC to untrust NIC.
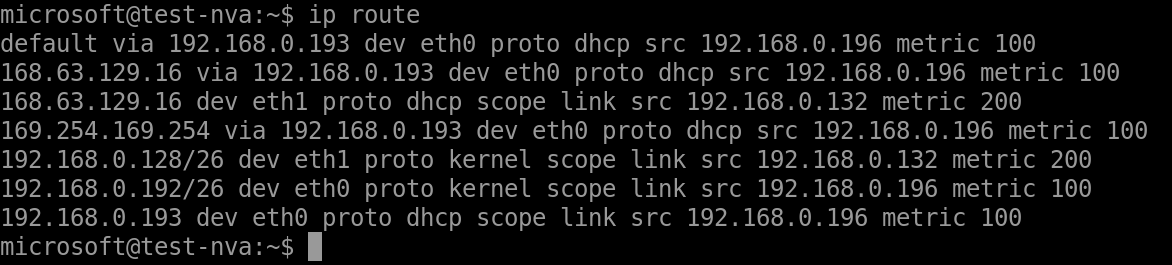
Since the untrust NIC is the primary NIC of the Ubuntu NVA, there is a default route automatically configured via untrust NIC in the guest OS by Azure. However, there is no default route via trust NIC as it is the secondary NIC. Wecan verify thi by viewing the route table by using ip route command.
Enable IP forwading in NIC
A NVA must be capable of routing traffic for which IP forwarding must be enabled.
We need to enable IP forwarding in the trust and untrust NICs of our Ubuntu NVA so that it could accept packets which are not destined to the NIC itself using Azure Portal as illustrated below.
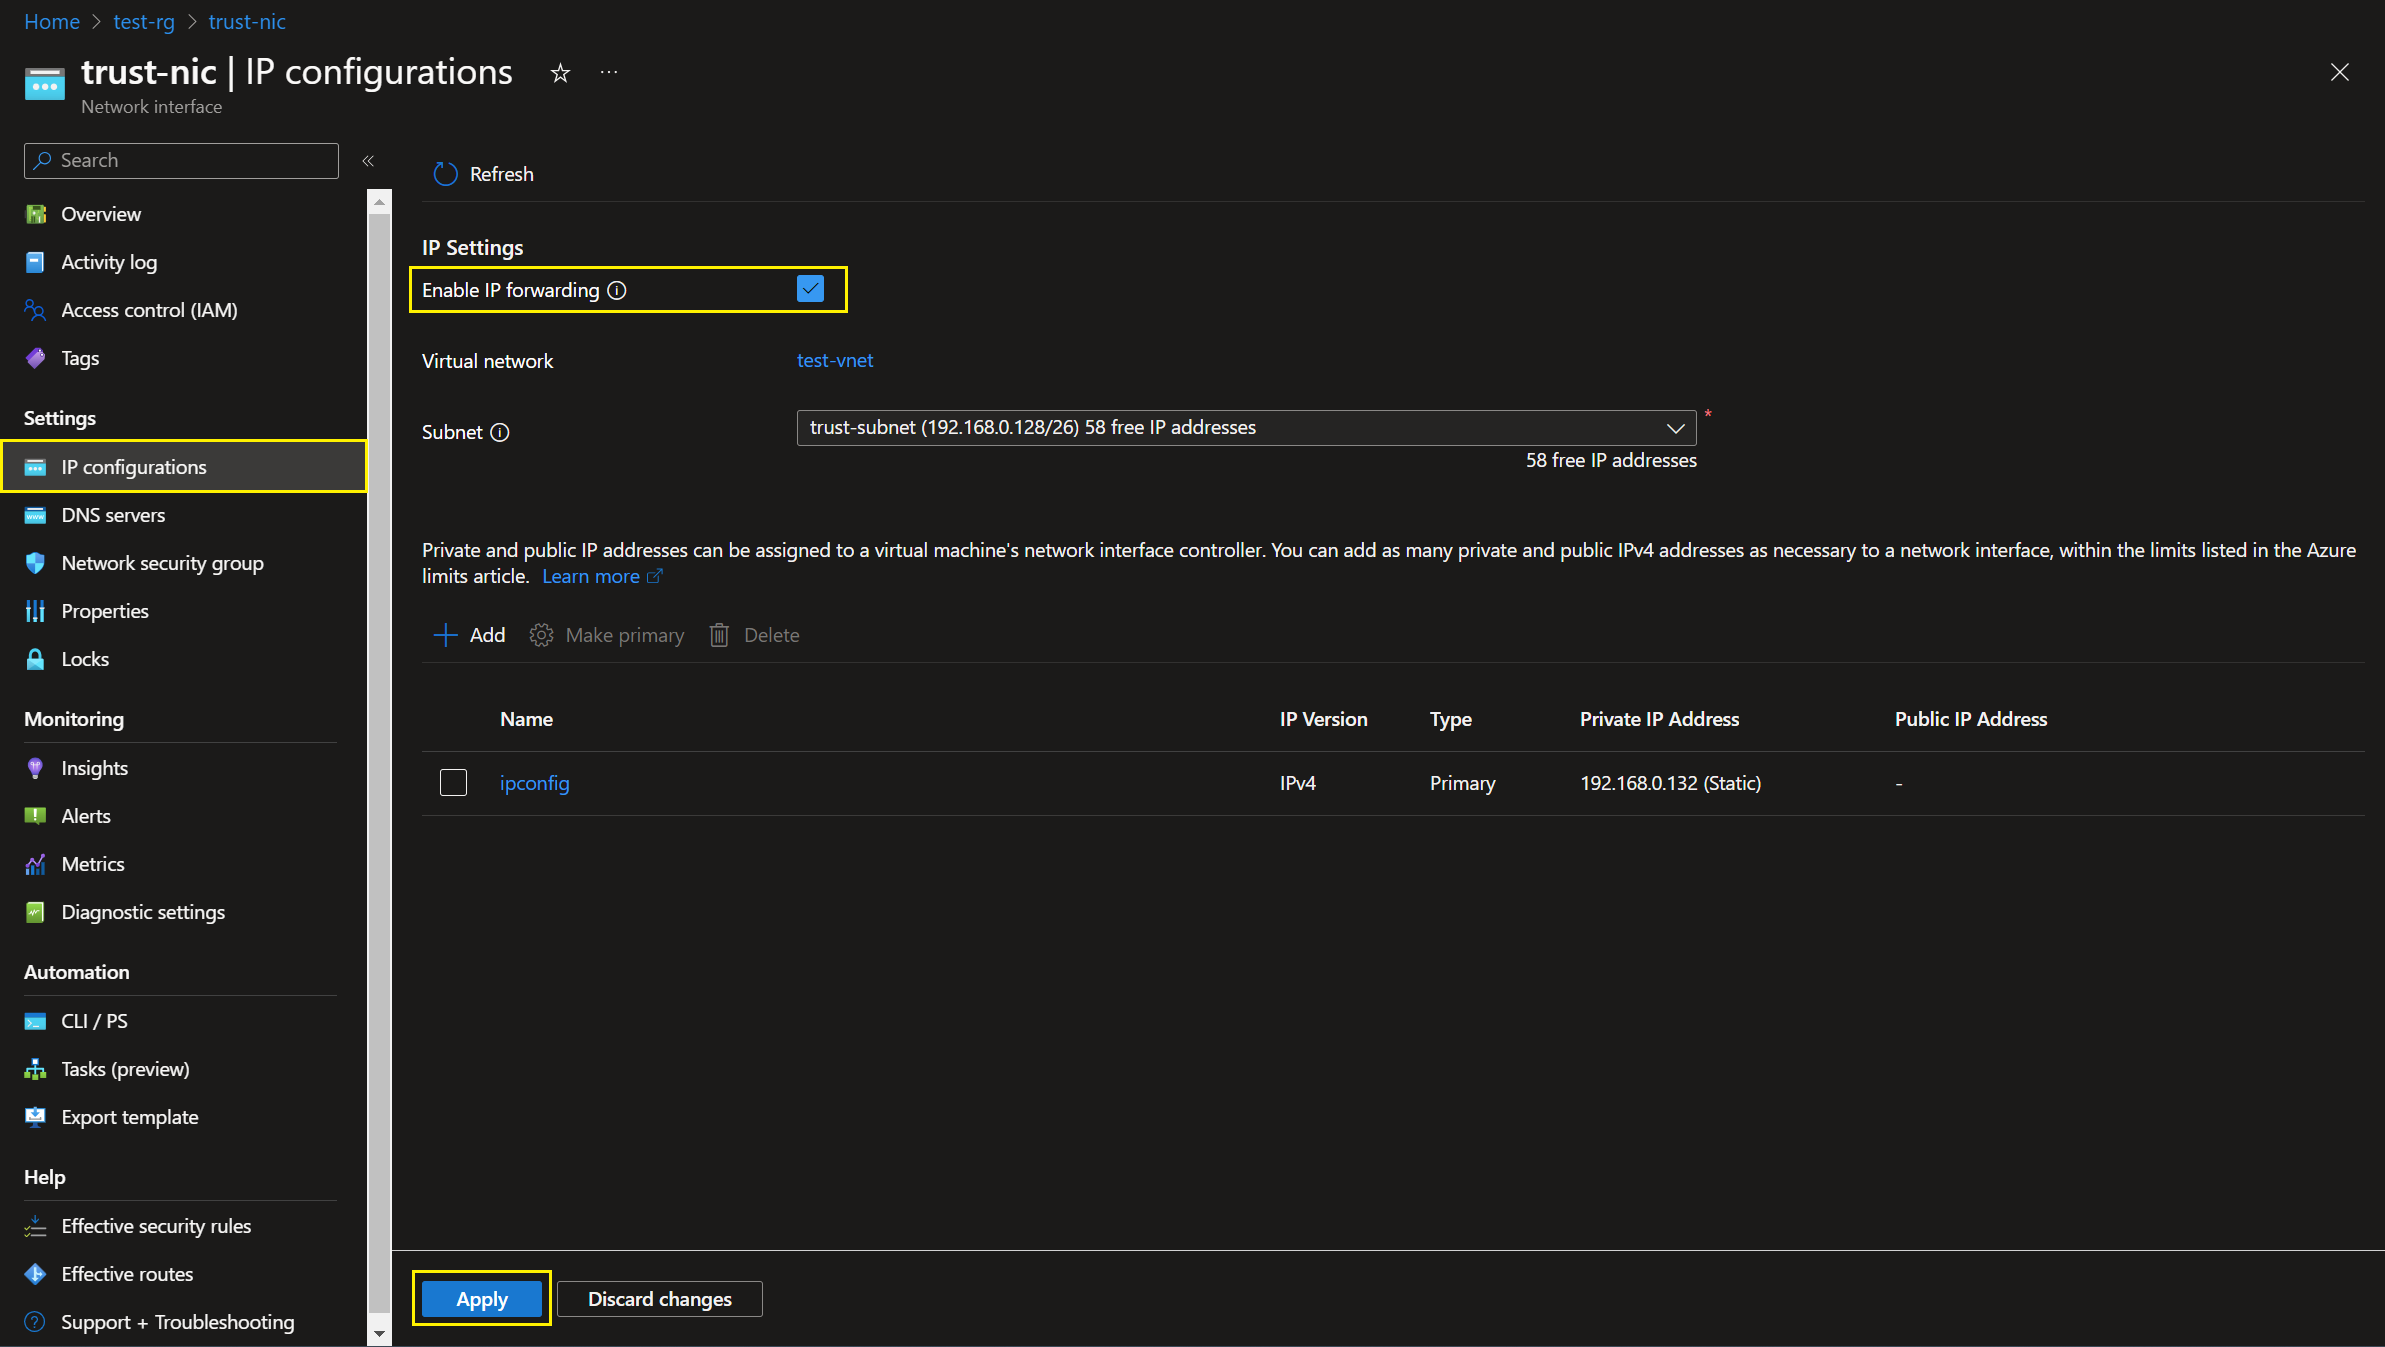
Please note that enabling IP forwarding in the NICs does not enable IP forwarding in the guest OS so we still need to enable IP forwarding in Ubuntu OS.
In Ubuntu, the IP forwarding can be enabled by modifying the contents of /etc/sysctl.conf. Another easy way to do it is by using sed command as below.
sudo sed -i 's/#net.ipv4.ip_forward=1/net.ipv4.ip_forward=1/g' /etc/sysctl.conf
sudo sed -i 's/#net.ipv6.conf.all.forwarding=1/net.ipv6.conf.all.forwarding=1/g' /etc/sysctl.conf
sudo sysctl -p
Example:

Configure SNAT using iptables
Our Ubuntu NVA will now route traffic from trust interface to untrust interface as per the route table in guest OS. Since the default route is via untrust interface, the internet destined traffic will be routed through the untrusted interface.
However, the traffic routed through the untrust interface will be dropped because in order to route any traffic to internet, the traffic must be NAT-ed using a public IP first.
You might be wondering that the untrust interface is already associated to a public IP so why it would be dropped. This is because the public IP would only be NAT-ing traffic with source as private IP address of the untrust NIC.
We would need our NVA to SNAT the traffic form the VM using the private IP address of its untrust interface and then route it through the untrust interface. This process of SNAT-ing the traffic is also called as IP Masquerading.
We will configure SNAT in our Ubuntu NVA using iptables. In case iptables package is not available, you could install it by executing the command sudo apt-get update && sudo apt-get install iptables.
Configure ‘iptables’ to SNAT any tarffic using the private IP address of the untrust NIC by executing the following command.
sudo iptables -t nat -A POSTROUTING -s 0/0 -o eth0 -j MASQUERADE
Example:

The configuration of iptables does not persist VM reboots. We would need to save the iptables configuration and run iptables at boot time.
We will save our iptables configuration using sudo iptables-save command and automatically run iptables during boot using a package iptables-persistent. You could install it using the command sudo apt-get update && sudo apt-get install iptables-persistent.
Verify routing via NVA
We will login to both VM and NVA using Bastion. In case you did not deploy Bastion, you could login to the NVA using SSH to its public IP. You may have 2 SSH sessions, one for NVA and another one where you will login to NVA first and then to the VM’s private IP.
Example:
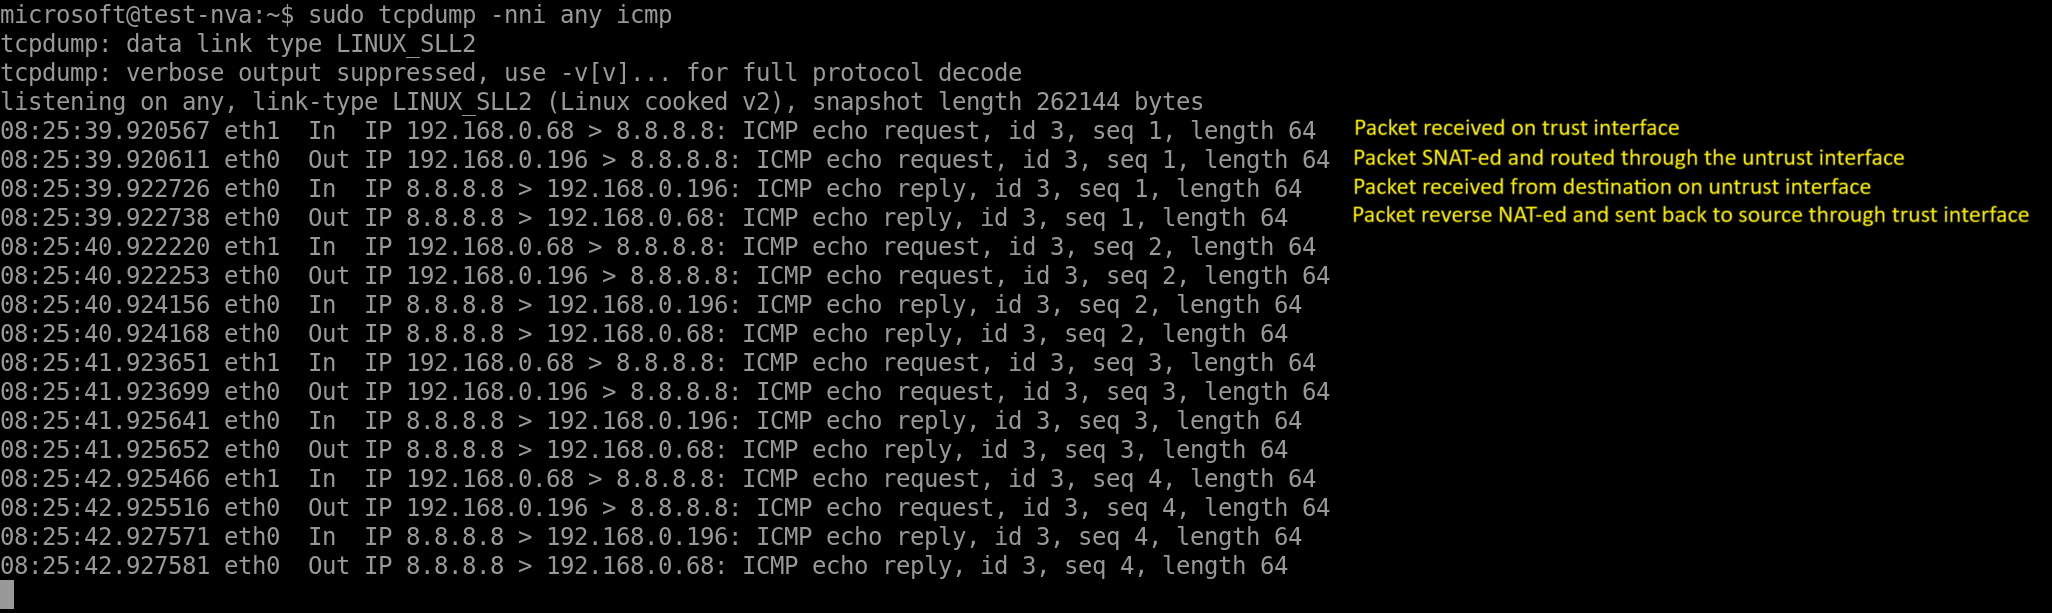
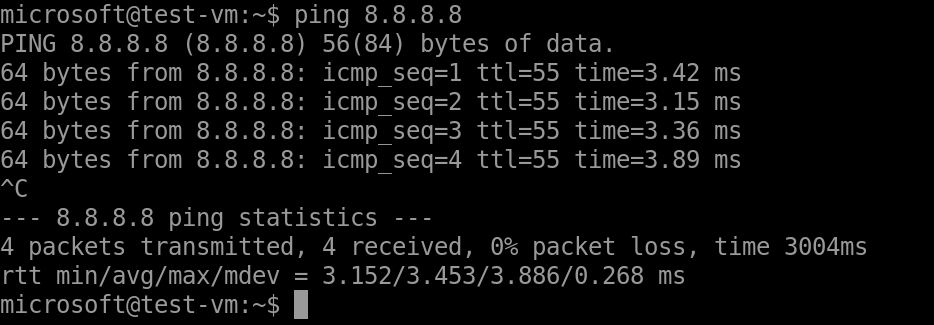
We will initiate a ping to 8.8.8.8 from the VM and perform a packet capture in the NVA using tcpdump.
Output of ping fom the VM.
Packet capture of the NVA.
sudo tcpdump -nni any icmp